

Introduction
If you’ve ever ordered patches that looked crisp online but arrived with muddy stitching, wrong colors, or flimsy backing, you already know the real problem: making a patch is easy; making a patch that holds up on clothing is the hard part. The difference comes down to design choices (thread density, borders, and backing) and production discipline (proofing, color control, and attachment testing).
This guide is built for creators, teams, brands, and clubs who want repeatable results—whether you’re crafting a few pieces at home or scaling up with a custom patches maker. At Best Patches, we’ve helped customers troubleshoot everything from “my patch won’t stay on a hoodie” to “my merrow border is eating my tiny text,” and the same set of fundamentals solves most of it.
A custom patches maker is a person, shop, or manufacturer that turns your artwork into physical patches using embroidery, woven, PVC, chenille, leather, or print methods, then finishes them with a backing (iron-on, sew-on, Velcro, or adhesive) designed for your garment and use case. The best makers provide proofing, material guidance, and quality control so the patch looks right and lasts.
What follows is an editor-level, field-tested workflow: how to pick the right patch type, prep artwork, choose backing, avoid common production traps, and attach patches cleanly to jackets, hats, workwear, denim, and performance fabrics.
Table of Contents
- Choosing the Right Patch Type for Clothing
- Design Rules That Prevent Costly Mistakes
- Materials, Borders, and Backings That Actually Hold Up
- DIY vs Hiring a Custom Patches Maker
- A Reliable Production Workflow from Proof to Delivery
- How to Attach Patches to Different Fabrics
- Quality Control Checklist for Every Order
- Case Study: Best Patches Fixes a “Failing Patch” Launch
- 2026 Patch Trends and What They Mean for Your Design
Choosing the Right Patch Type for Clothing
The fastest way to waste money is picking a patch style because it “looks cool” without matching it to your garment and wear conditions. Patches aren’t just decoration—they’re a small engineered product: a face material + edge finish + backing + attachment method.
Embroidered patches
Best for bold logos, classic looks, and durability. Embroidery gives texture, but it has limits: tiny lettering and thin lines can fill in as the stitch count rises. If your design relies on micro-detail, embroidered may not be the best first choice.
- Best on: denim jackets, canvas, workwear, varsity jackets, structured hats
- Watch-outs: small text, gradients, photo-like shading
Woven patches
Woven patches use thinner threads and tighter weaves than embroidery, so they hold small text and fine details better—without the thick, raised texture. If you need legible text at 1.5–2 inches wide, woven is often the cleanest option.
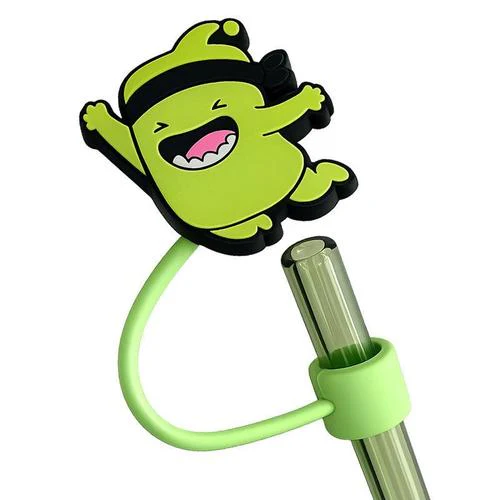
PVC (rubber) patches
For outdoor gear, tactical looks, and heavy exposure to moisture, PVC is a workhorse. It’s easy to clean, holds shape well, and resists fraying because there’s no thread edge to fuzz out.
- Best on: backpacks, rain jackets, outerwear, gym bags
- Watch-outs: heavier feel; needs strong attachment choices
Chenille patches
Chenille is the varsity classic: big, bold, and fuzzy. It’s not meant for small details, but for impact at a distance, it’s unbeatable.
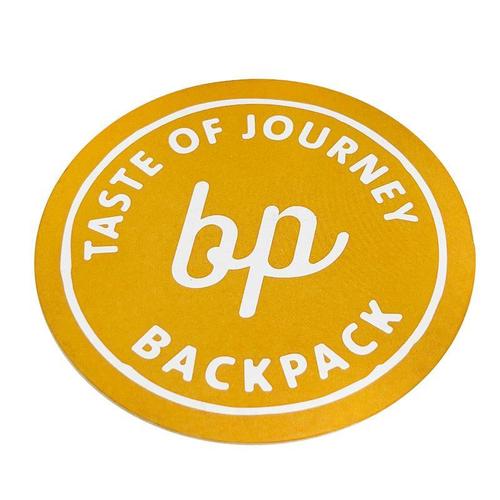
Printed patches
Printed patches (including dye-sublimation style looks) are your friend when you need gradients, photos, or complex artwork. The trade-off is often abrasion resistance compared to heavy embroidery, so placement and top-layer finishing matter.
“If your artwork depends on legible micro-text or thin outlines, choose a woven or printed patch first—then add embroidery only where the texture truly adds value.”
Design Rules That Prevent Costly Mistakes
Patches fail in predictable ways: unreadable text, wrong colors, borders that look cheap, and shapes that warp. Most of those failures originate in the design file. The good news: you can fix them before production.
Size and readability rules that work in the real world
Clothing moves, wrinkles, and curves. A design that reads on a flat screen can disappear on a sleeve or cap. Use these practical thresholds:
- Minimum text height: about 0.2 inches for embroidery; smaller is risky unless woven
- Minimum line thickness: keep thin lines noticeably thickened for embroidery to avoid “stitch swallow”
- Negative space: don’t crowd elements; thread needs breathing room
- Edge-safe zone: keep important details away from the border so the edge finish doesn’t clip them
Color strategy: pick fewer colors, but pick them smarter
Thread and fabric do not behave like pixels. Light threads can look darker on dark twill; bright reds can drift depending on dye lots. Many makers match thread to Pantone references, but physical matching still benefits from proofs and (when the order is large) a pre-production sample.
According to a 2024 report from the Pantone Color Institute on brand color consistency in physical applications, the biggest drivers of mismatch are substrate influence and lighting conditions during approval—both of which are relevant to patches. That’s why approving a digital proof alone can be risky for mission-critical brand colors.
File formats and what to send
A strong custom patches maker can work from most files, but you’ll get faster proofs and fewer errors if you send:
- Vector: AI, EPS, or SVG (best for logos and clean shapes)
- Raster: PNG at 300 DPI with transparent background (acceptable for printed patches)
- Notes: intended size, garment type, placement, and backing preference
Materials, Borders, and Backings That Actually Hold Up
When people complain that a patch “feels cheap,” they’re usually reacting to one of three things: flimsy base fabric, messy edge finishing, or the wrong backing for the garment.
Patch bases: twill, felt, and specialty fabrics
- Twill: the most common base; stable, clean, and cost-effective
- Felt: common for chenille; soft but can pill if abused
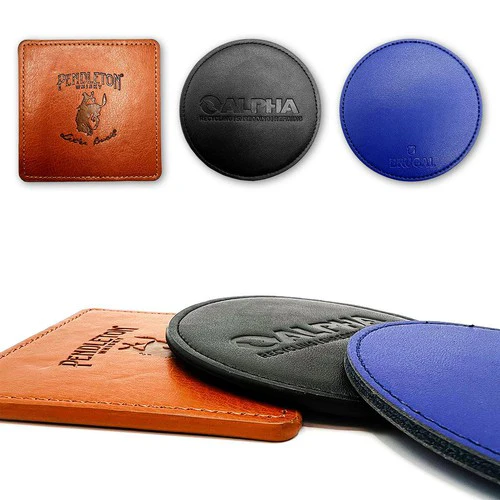
- Leather/suede: premium look; needs careful washing guidance
Borders: merrow vs heat-cut
- Merrow border: thick wrapped edge, classic look; best for simple shapes
- Heat-cut border: cleaner for detailed silhouettes and sharp corners
Backings: choose based on fabric, wash, and stress
Backing is where “looks great” becomes “stays on after 20 washes.”
- Sew-on (no backing): maximum reliability; best for heavy use and frequent washing
- Iron-on: fast; great for casual wear, but not ideal for stretchy performance fabrics unless reinforced
- Velcro (hook & loop): removable; great for uniforms and tactical gear; requires stitching to be trustworthy
- Adhesive (peel-and-stick): temporary placement; not a final attachment for clothing

Comparison table: which patch solution fits which business scenario
| Scenario | Recommended Patch Type | Best Backing | Why It Works |
|---|---|---|---|
| Streetwear drop on denim jackets | Embroidered (high stitch count) | Sew-on or iron-on + perimeter stitch | Texture looks premium; stitch reinforcement survives wash cycles |
| Corporate uniform program (polos/work shirts) | Woven | Sew-on | Fine text stays legible; consistent appearance across batches |
| Outdoor brand on rain shells and backpacks | PVC | Velcro + stitch-down | Water resistance; removable for cleaning; durable edge |
| School/college varsity letter program | Chenille + felt | Sew-on | Classic look; strong hold on heavy jackets |
| Artist merch with gradients or photo art | Printed patch | Iron-on + stitch corners | Preserves color complexity; stitch points prevent edge lift |
DIY vs Hiring a Custom Patches Maker
DIY can be satisfying, but it’s not always cheaper once you count your time, materials, and re-dos. Hiring a maker makes sense when consistency and deadlines matter.
When DIY is a smart move
- You need a handful of patches for a prototype photo shoot
- You’re testing a design before committing to volume
- You want an intentionally handmade aesthetic
When a maker is the better business decision
- You’re selling patches or apparel and returns would hurt
- You need color consistency across reorders
- You need 50+ units with professional finishing
- You want expert guidance on borders/backings and production limits
“A professional patch isn’t just the front face—it’s the backing, edge, and the quality checks that keep it from curling, fraying, or peeling after the first wash.”
A Reliable Production Workflow from Proof to Delivery
This workflow is what we use to keep projects on track and prevent “surprise” results.
Step-by-step production checklist
- Define the use case: garment type, placement, wash frequency, and whether removability matters.
- Choose patch type: embroidered, woven, PVC, chenille, leather, or printed based on detail and wear.
- Lock the size: confirm width/height in inches; don’t rely on “about palm-sized.”
- Pick border and backing: merrow vs heat-cut; sew-on vs iron-on vs Velcro.
- Approve the proof: check spelling, spacing, color notes, and edge-safe zone.
- Request a pre-production sample: especially for large orders, uniform programs, or strict brand colors.
- Run attachment testing: iron-on test on actual fabric; wash test if feasible.
- Finalize packaging and delivery timing: bulk bagging vs individual packing; confirm lead times and shipping method.
According to a 2025 Adobe survey on customer experience and brand trust, customers are more likely to abandon repeat purchases after quality mismatches than after moderate price increases. For patches, that translates to one simple rule: consistency beats complexity. A slightly simpler patch that matches every time will outsell a complicated one that varies.
How to Attach Patches to Different Fabrics
Attachment is where clothing patches either become a long-term asset or a customer support ticket. The “right” method depends on fabric composition, stretch, and heat tolerance.
Iron-on method that reduces peeling
Iron-on is convenient, but the adhesive needs pressure, time, and the right temperature. Always test on a hidden area first.
- Preheat the garment area for 8–12 seconds to remove moisture and wrinkles.
- Position the patch and cover it with a pressing cloth (cotton works well).
- Press firmly (don’t slide) for 20–35 seconds, depending on patch size and fabric tolerance.
- Flip inside out and press the reverse side for 15–25 seconds when safe for the garment.
- Let it cool completely before moving the garment; adhesive sets as it cools.
- Reinforce for real-life wear by stitching around the edge or tacking corners (recommended for hoodies and backpacks).
Sew-on method for maximum durability
If the garment will be washed often, worn in rough conditions, or sold commercially, sewing is the safest. A tight zigzag or straight stitch around the border works well. For thick patches on thin fabric, use stabilizer on the inside to prevent puckering.
Special cases: stretch fabrics, nylon shells, and hats
- Stretch fabrics (spandex blends): avoid iron-only attachment; use sew-on or a professional heat press plus reinforcement.
- Nylon/poly shells: high heat can warp or melt fabric; prioritize sewing or low-temp approved methods.
- Hats: curved panels distort designs; keep patches smaller and simplify details, especially near edges.

Quality Control Checklist for Every Order
Even if your maker is excellent, you should verify a few non-negotiables. This protects your brand and prevents reorder headaches.
What to check when patches arrive
- Count and assortments: verify quantities by size/colorway
- Edge finish: no fraying, gaps, or uneven border thickness
- Stitch density: filled areas shouldn’t show base fabric unless intentionally designed
- Text legibility: check the smallest text first
- Backing integrity: iron-on adhesive should be even; Velcro should be aligned and well-bonded
- Color consistency: compare across the batch under neutral light
Risks and limitations to plan for
Being realistic upfront saves money:
- Very small patches can lose detail quickly in embroidery.
- Iron-on only can fail on textured knits, heavy fleece, or frequently washed items without reinforcement.
- High-detail borders raise costs and can increase rejection rates if the shape is too intricate.
- Color-critical brands may need sampling and tighter approvals, which adds lead time.
Case Study: Best Patches Fixes a “Failing Patch” Launch
I’ll share a real pattern we’ve seen repeatedly at Best Patches. A small streetwear label came to us after a previous run arrived with two issues: the tiny slogan text looked clogged, and the iron-on backing started lifting at the edges after a couple washes on hoodies.
We treated it like a systems problem, not a blame problem. First, we recommended switching from embroidered to woven for the text-heavy design, keeping only a small embroidered element for texture. Second, we changed the backing plan: iron-on for speed, but with a mandatory perimeter stitch (or at least corner tacks) for anything sold to customers. We also adjusted the border style to a cleaner heat-cut edge because the prior merrow border was visually overpowering at that size.
I personally reviewed the proof with them and flagged two letters that were too close together at the final patch dimensions. That one micro-adjustment—adding spacing—made the slogan readable from arm’s length, which is the distance that matters in real life.
The result: fewer customer complaints, better product photos (because the text finally read on-camera), and simpler reorders because the design rules were documented. That’s what a good custom patches maker relationship looks like: you build a repeatable specification, not just a one-off patch.
2026 Patch Trends and What They Mean for Your Design
Patch trends are shifting toward performance, personalization, and smaller-batch drops—while customers still expect “retail-grade” finishing.
What’s gaining momentum
- Modular systems: Velcro-backed patches on jackets, bags, and uniforms for fast swapping
- Mixed materials: woven base + embroidered highlights; PVC elements paired with textile borders
- Brand-proofing: consistent reorders through documented thread/color references and approved proofs
- Eco-conscious packaging: less plastic and more minimal packing for bulk drops
How to design for these trends without risking quality
Keep your “core patch” simple and repeatable, then create limited variants using colorways or small add-ons. This reduces production variables and improves consistency across restocks. According to a 2023 McKinsey report on apparel operations and product complexity, reducing SKU complexity is strongly correlated with fewer production errors and faster cycle times. Patches follow that same logic: fewer variables, fewer surprises.
Conclusion
Making custom patches for clothing that look sharp and stay put comes down to matching the patch type to the job, designing within real manufacturing limits, choosing the right border/backing, and verifying quality before you scale. The difference between “cool patch” and “professional product” is rarely luck—it’s process.
- Next step from Best Patches: Write down your use case (garment type, placement, wash frequency) before you finalize artwork.
- Next step from Best Patches: If your design has small text, ask for woven or printed options and review a proof at final size.
- Next step from Best Patches: For iron-on orders intended for resale, plan a perimeter stitch or corner tacks to prevent edge lift.
References
- Pantone Color Institute (2024): Guidance on maintaining brand color consistency across physical substrates and varying lighting conditions, relevant for thread/fabric color approvals.
- Adobe (2025): Customer experience research highlighting how perceived quality consistency influences repeat purchasing and brand trust.
- McKinsey (2023): Apparel operations findings on complexity reduction improving production reliability and speed, applicable to patch SKU and design variability.
FAQ
What is a custom patches maker, and what should they provide?
-
A custom patches maker is a shop or manufacturer that converts your artwork into physical patches (embroidered, woven, PVC, chenille, printed, or leather) and finishes them with the right border and backing. A solid maker should provide clear proofs, guidance on size/detail limits, and quality control checks so your patches arrive consistent across the batch.
Is iron-on backing enough for hoodies and jackets?
-
Sometimes, but it depends on how the garment is used and washed. For casual wear, iron-on can hold well if applied with proper heat and pressure. For resale items, heavy hoodies, or frequent washing, it’s safer to iron-on plus a perimeter stitch (or at least corner tacks) to prevent edge lift over time.
What patch type is best for small text?
-
For small, legible text, woven patches are often the best choice because the thread structure is finer than embroidery. If your design includes gradients or photo-like detail, a printed patch may be better. For either option, keep adequate spacing between letters so they don’t visually merge on fabric.
What file format should I send to Best Patches?
-
For the cleanest proofing, send a vector file (AI, EPS, or SVG). If you only have raster artwork, use a PNG at 300 DPI with a transparent background. Also include the finished patch size in inches and your preferred border/backing so we can quote and proof accurately.
How do I prevent embroidered patches from looking “overfilled”?
-
Simplify tiny details, thicken thin lines, and increase spacing between elements. If the design depends on fine outlines or small lettering, switch to woven for clarity or use embroidery only on key areas (like the main icon) while keeping text woven/printed.
Can I wash clothes with custom patches attached?
-
Yes. For best longevity, turn garments inside out, wash cold on a gentle cycle, and air dry when possible. If the patch is iron-on only, repeated high-heat drying increases the odds of edge lift; sewing the patch down (even just around the border) is the most dependable option for frequent washing.
How many patches should I order for a first run?
-
If you’re testing a design, a small QC batch (often 10–20) is a practical starting point for photos and wear tests. If you’re selling immediately, choose a quantity that matches your launch plan and budget—but prioritize a proof and (for higher stakes) a pre-production sample to avoid expensive rework.